Instead of uploading and editing a screencast video, a far easier path is to transform a few short videos into animated GIFs to create step-by-step instructions. This is helpful if you need to make a PC support document at work or just show your dad how to turn off his computer. GIFs are helpful because they endlessly repeat their animation, as opposed to a video that has to be restarted each time you want to view it.
One really easy way to turn screencasts into GIFs is to use a free desktop program called Recordit for Windows and Mac. This simple program lets you record a screencast then automatically uploads it to the cloud where you can share it with others or turn it into a GIF with one click.
Recordit

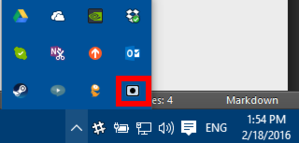
After you’ve downloaded and installed Recordit, you can find it in your Start menu (or the All apps screen in Windows8). Once you launch it, don’t expect to see a program window with an interface. All Recordit offers is a small gray icon with a black dot in the middle that sits in the system tray. To access it, click the upward facing arrow on the far right of the taskbar.

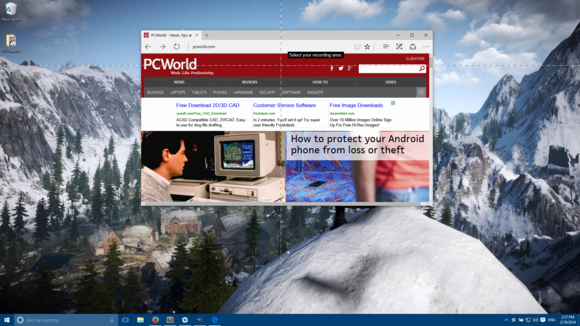
To start recording a screen capture, click the icon. A tool will take over your display, similar to rectangle select in an image editing program. Now you have to select the area you want to record. Pick one corner and click, then drag your mouse until you have the entire area that you want to record covered—Recordit will not record the taskbar.
Once you’ve got the area selected, you’ll see a record button just outside the selected area (or inside if you chose the whole desktop). Click that and your screencast recording starts. Now, just record whatever action you want.
When you’re done, click the recording button again, which now says Stop. Once you do that, Recordit automatically starts uploading your video to Recordit’s servers.

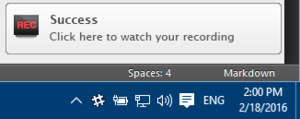
When the upload is finished, you’ll see a notification similar to the one seen here. Click that, and you’ll go straight to the video.
Now for the easy part. In the bottom right corner you’ll see a big button that says GIF. Click it and your video becomes a GIF ready for download. If you don’t like GIFs, you can download your screencast as a regular video.
Recordit keeps a running tab of your screen recording uploads. To view older ones, right-click the program’s icon in the system tray and select Recent Screencasts.
Recordit is a very simple tool, but there are a few drawbacks. The free utility doesn’t offer any editing tools. That means you can’t cut down your screencast video into smaller chunks and then turn each smaller piece into its own GIF.
Recordit also records your screencast at a low frame rate (and no sound)—presumably to save on bandwidth.
The other thing to keep in mind is that Recordit automatically uploads your video to the cloud where it becomes public. Only you know the video’s actual URL, but it wouldn’t be impossible for a ne’r-do-well to uncover it. There also doesn’t appear to be any way to delete uploaded videos. That makes Recordit a great tool for showing someone how to launch a program or edit a public document but not for anything that involves private information.
